Marcia's Blog
Chablis - Developing the Leaves
by Marcia Minnichhofer on 11/17/16
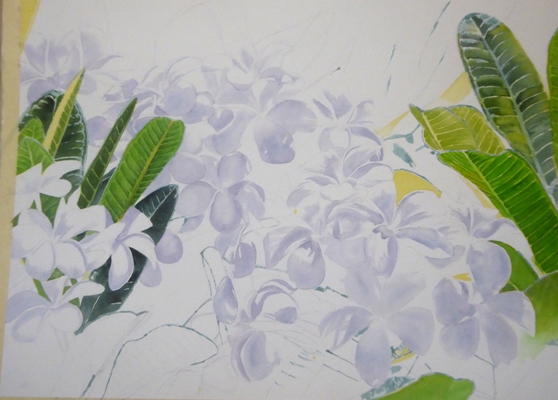
Second glaze over the leaves and they will have to go darker still. I will probably go lighter on the blue background later and the pink tips are lost with all of the green so they will go darker.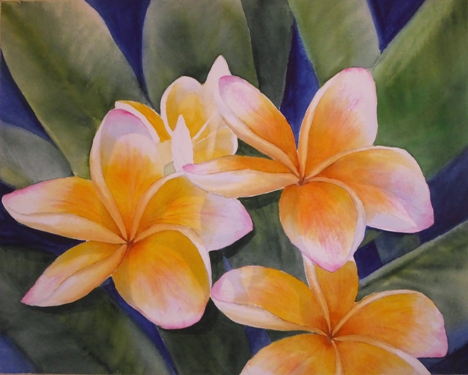
Yikes!
by Marcia Minnichhofer on 11/17/16
Those of you who have been coming to this blog to watch my painting process know how detailed I can get. Jumping in and doing these leaves loose was a giant leap for me!
The Chablis variety of plumeria has dark green shiny leaves so I will have to remember that going forward.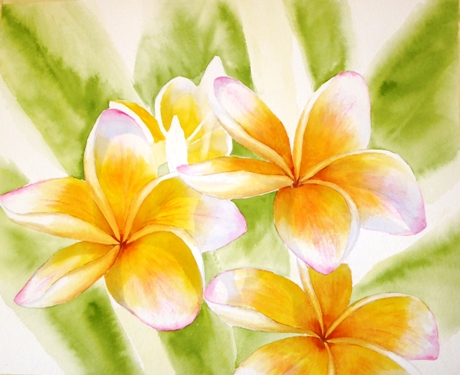
Chablis - A Hint of Pink
by Marcia Minnichhofer on 11/16/16
The petals have a bit of pink and a little more mid petal. The paper is still white. I had to adjust the color to show the pink tips. I will start the background next to see if the flowers need more paint. 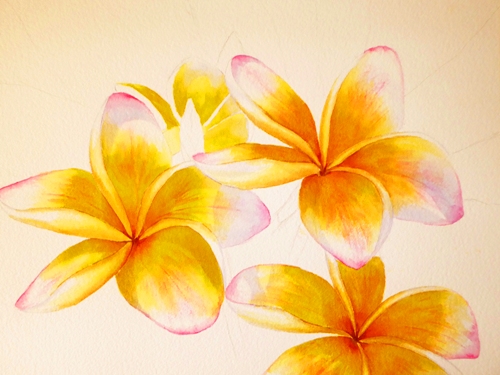
Plumerias in Paradise Giclee Prints
by Marcia Minnichhofer on 11/16/16
I have added the 'Plumerias in Paradise' giclee print in the link, Gallery - Plumerias 3, on this website if you are interested in having one for your home.
Chablis Continued
by Marcia Minnichhofer on 11/16/16
The plumeria centers and turned up petal edges are done for now. Sometimes when a dark background goes in, the flowers have to be made darker. I still intend for the background to be very loose with just an impression of leaves.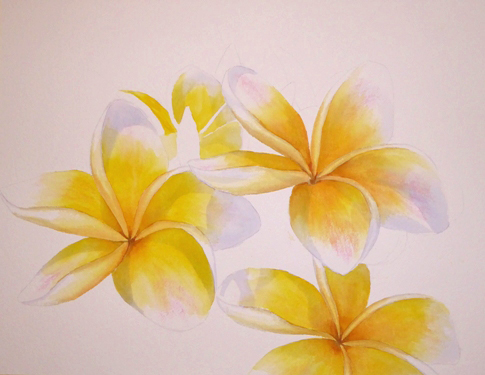
Chablis First Layer Yellow
by Marcia Minnichhofer on 11/14/16
I really like this shade of bright yellow. I have a little bit of pink toward the outer half of the petals. Darker centers will be added to give the flowers more depth. The live blossoms start out as a dark yellow and then gradually become white. I did not go with all yellow petals because I want the white of the petals meeting the dark background later. 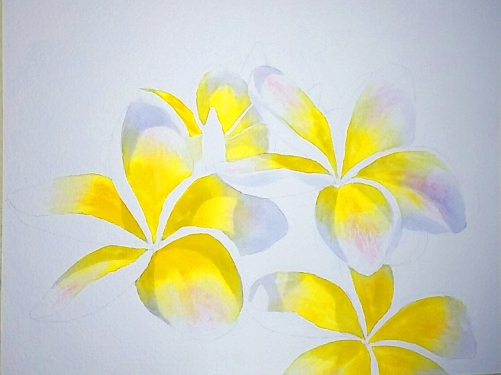
'Chablis Plumeria' 16x20"
by Marcia Minnichhofer on 11/14/16
I was very excited when a Facebook friend posted a photo of a single Chablis plumeria. It has a very deep yellow/orange center with a pale pink around the edges. Unlike my previous painting of the white Singapore plumerias, this one will have very large blossoms and a very loose background. I am using 300# Arches watercolor paper which is whiter than in this photo. I started with the shadows first.
Plumerias in Paradise Completed
by Marcia Minnichhofer on 11/03/16
I am happy with how this 21x28" painting turned out and will take it to the photographer tomorrow for future 18x24" prints which will be on this website in about 2 weeks..
I am also off the island for a week and will start my 16x20" yellow Chablis plumeria painting when I return. You can check back around November 15 if you are interested in following along.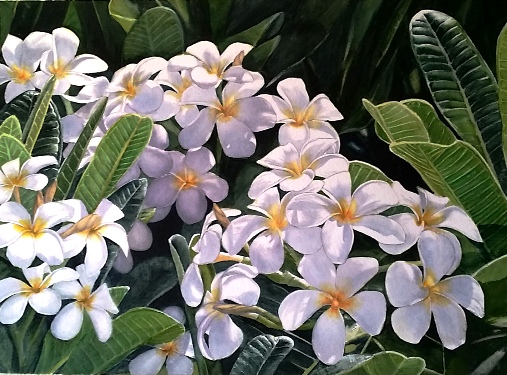

Home Stretch with 'Plumerias in Paradise"
by Marcia Minnichhofer on 11/02/16
I will finish up the bottom left-hand corner, then further refine the flowers and leaf edges over the entire painting. All of the masking fluid is off the leaf edges and some softening of those edges is necessary. 
November-December Fairs
by Marcia Minnichhofer on 11/01/16
As the year comes to a close, it is a busy fair season. I will be at the following:
Nov 5 - Princeville - Church of the Pacific 8 to 2
Nov 12 - Koloa - St. Raphael Church 8 to 2
Nov 19 - Poipu - Poipu Beach Park area next to the parking lot 9 to 3
Nov 26 - Kapaa - Kapaa Middle School Christmas Fair at Kapaa Beach Park 9 to 4
Dec 3 - Kapaa - All Saints Church Christmas Fair - 9 to 2
Dec 10 - Princeville - Church of the Pacific 8 to 2
Dec 16 - Friday, Marriott Hotel lower level in Lihue, 9 to 3.
Adding a Flower
by Marcia Minnichhofer on 10/31/16
I started on the inflo at the bottom left by adding another blossom over those 2 green leaves at the bottom. The leaves by themselves looked odd. I drew the blossom on another piece of thick paper, then cut out a template/stencil, laid it over the leaves, and then scrubbed out the green where the flower would go. This is the advantage of using 300# watercolor paper. You can carefully scrub with a Mr. Clean sponge without making a hole in the paper. 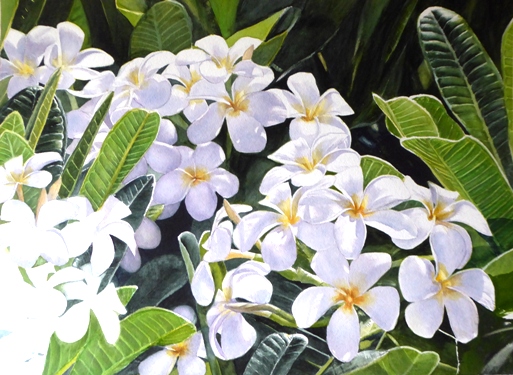
More Work on Flowers and Buds
by Marcia Minnichhofer on 10/30/16
Defined the rest of the flowers in the group bottom right and continued with flowers in the next group above left. These are two separate groupings of flowers on separate stalks. Each is called an inflorescence or inflo. The two plumerias at the far upper left are not a part of these first two inflos.The 4th group of flowers are to the left of the scene and will be my last area of concentration. When these are done I will go back and clean up the edges.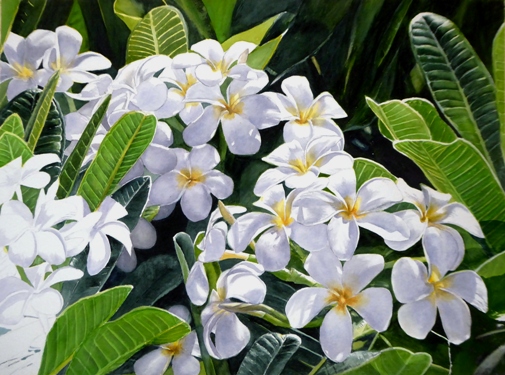
Continuing On
by Marcia Minnichhofer on 10/27/16
I have started to darken some of the plumeria in the middle to push them under and into the shadows. Have also started on the background in the upper left so that I can see better how to do those flowers up there. Have not removed the mask on the leaves to the left yet and won't do so until the flowers above them are done. Decided to show more of the leaf in that very dark area in the middle and may even have more showing. For those keeping track, I have spent 36 hours on this painting so far. 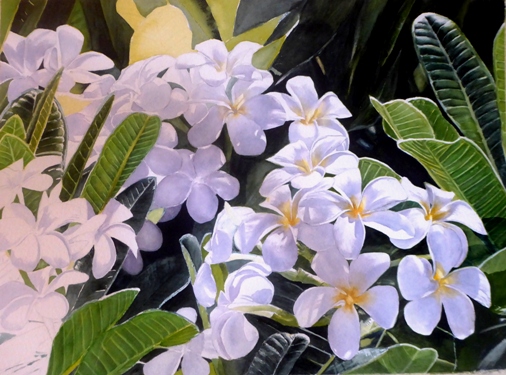
Singapore Obtusa Plumerias Continued
by Marcia Minnichhofer on 10/25/16
I went darker with the background on the upper right and behind the flowers next to those leaves. I will push them further back after all of that background is in. The background leaves are actually not as dark as you see in this photo. 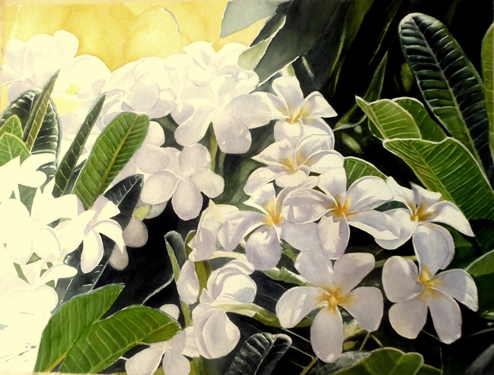
Showing Some Depth
by Marcia Minnichhofer on 10/24/16
The very dark area in the left half is in shadow and further back in the scene. I will probably show more of the leaf (with masked edge) in that dark area. It will look more realistic when I paint the flowers above that area with more shadow. In the end, the inflo bottom right will come forward and the flowers in shadow will be pushed back. You can see my erased lines on the two light green leaves bottom left so I will have to fix those.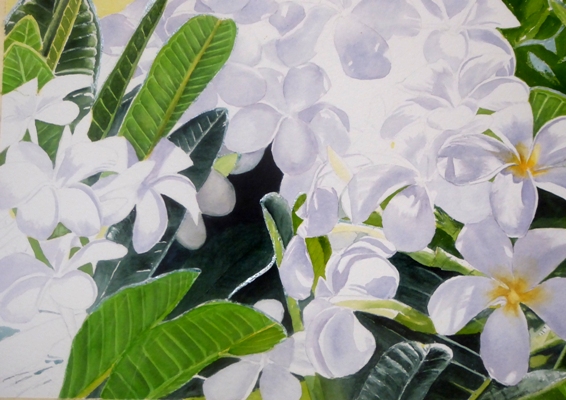
Plumerias in Paradise Continued
by Marcia Minnichhofer on 10/23/16
The background behind the flowers is a bit complicated. 5-1/2 hours later, this is where we are. The yellow flower centers are photographing more orange as is the first layer of leaves in the upper left corner. I have peeled off some of the leaf edges in the painting. You can see how the mask saved the white edges.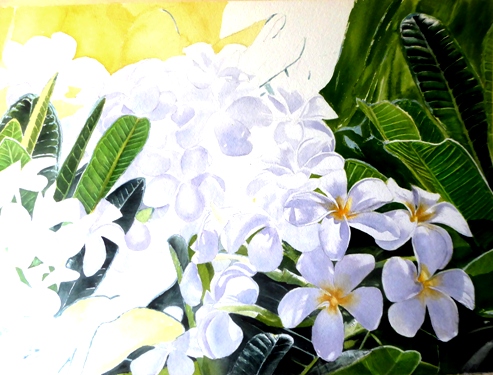
Craft Fairs in October and Calendar Inventory
by Marcia Minnichhofer on 10/21/16
I will be at a fair tomorrow, Saturday, at Koloa Elementary School from 8 to 2 and the following Saturday, Oct 29, at the Hanapepe United Church of Christ from 9 to 1. On November 5, we will return to the Church of the Pacific in Princeville from 8 to 2.
If you had planned to order a calendar, you might want to do that soon. I am running low and should sell out by the end of November.
A Few Flowers
by Marcia Minnichhofer on 10/21/16
I darkened the shadows more on the 4 plumerias at the bottom right to make the white pop. 3 of them have yellow centers. Then I darkened the area behind them. This portion took me 3-1/2 hours. (If you are new to this blog, I have started to log how much time a painting takes. It wasn't accurate to count days or months since I don't paint every day or all day.) I am doing a craft fair tomorrow so will resume on Sunday. 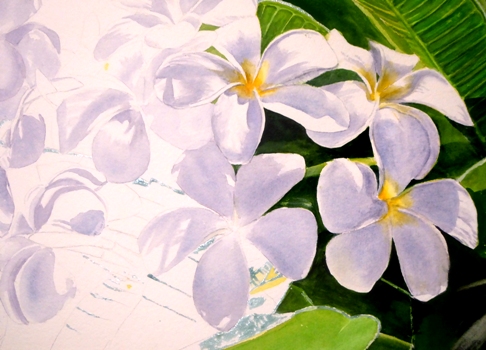
First Layer of Background and Masking Fluid
by Marcia Minnichhofer on 10/20/16
I usually fiinish the flowers first but this is a complicated painting so I decided to put the first layer of the background in to see how dark the shadows of the flowers have to go. The upper right background will have more different colored layers of paint and will probably be as dark as the bottom right corner in the end. I am not making it dark yet because if I were to accidentally drop water on the dark, I would have a blotch in the the thick layers of background.
Rick on Facebook on my 'Plumeria Paintings by Marcia' page asked me about masking fluid. It is like rubber cement. You put it over the areas you want to keep white and then peel it off after you have finished painting around the mask. It preserves the white of the paper under it. I have used Winsor Newton's Art Masking Fluid but started using "drawing gum" by Pebeo and like it better because it is thinner and goes on more smoothly. If you look closely on the right side, I have not peeled it off around the light green leaf edges and you can see areas of lighter color with a bluish tint that will be removed later. I still have the mask around the edges of the leaves on the left. I paint around the white flowers. You can see how light the flower shadows look against the dark background so I will have to go back and darken them.
I am going to activate the comments capability of the blog in case anyone wants to ask specific questions. I used to be a teacher and love to share so feel free to comment or ask me a question. 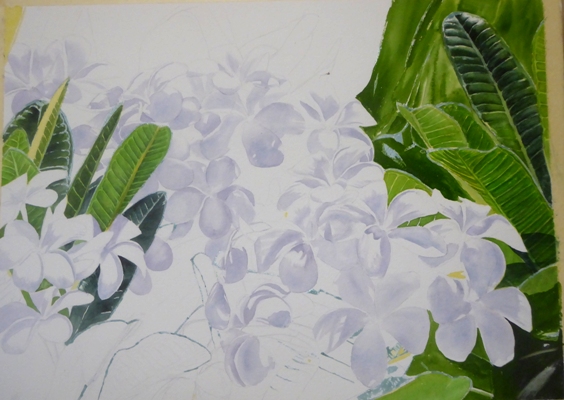
More Leaves
by Marcia Minnichhofer on 10/18/16
The leaves on the right do not look like much for 4 hours of painting but it is a start. Much more work needs to be done. The liquid mask is still on all the leaves, especially on the edges, to 'save the white' highlighted areas.
As you have guessed by now, I don't paint all day long. I have a couple of elder clients who require some of my time and one just went into rehab after hip surgery. Thank you for your continued interest in the progress of each painting. This website also has step-by-step photos for some of my plumeria paintings. The links are below on the left.